IMperfect food box review

This is part two of my “ugly produce” box review. If you have not read my first post, I would recommend you doing so before continuing here. 🙂

First, apologies for not having this review up sooner. I had most of it written then my computer crashed out and I lost the entire post. I was so irritated I just couldn’t start over until today.

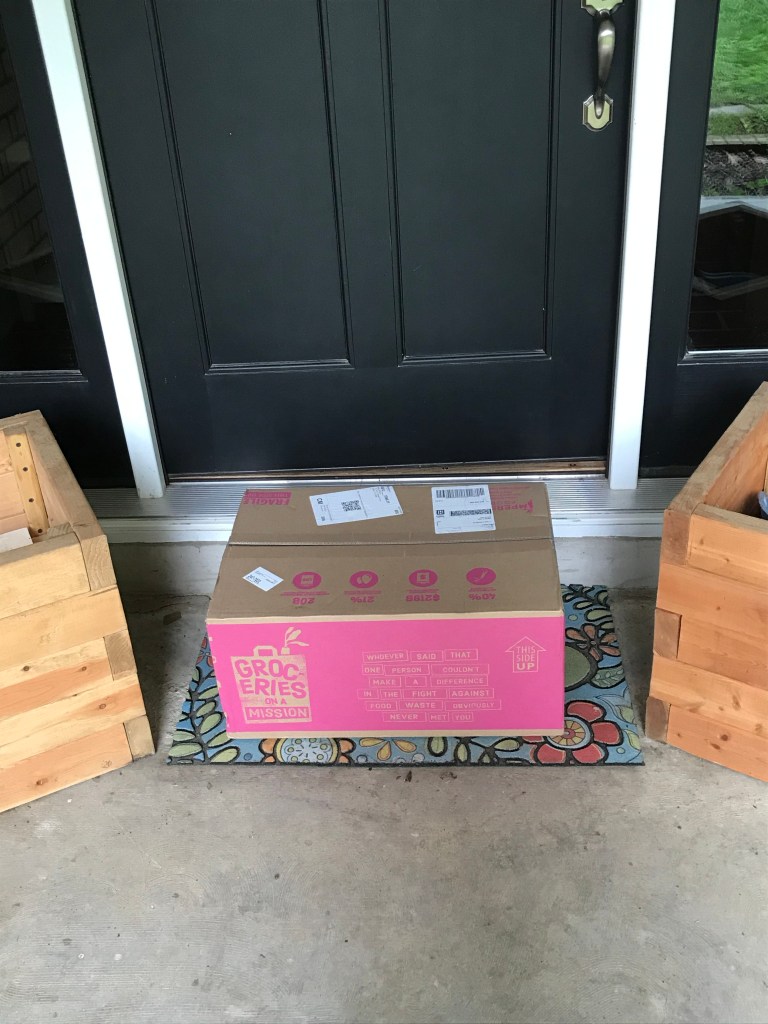
That said, my “ugly produce” box finally arrived! I don’t know the last time I was so silly excited about something. My box was delivered as scheduled by FedEx and left at my front door on Wednesday. I’ve been working from home lately, meaning I was here to grab my box as soon as it was dropped off. While it was packaged really well, it will NOT survive all day on my front porch in the brutal summer heat during the next few months. It will be fine for a few hours, but not all day. Nice fact though, I received an email as soon as they dropped it, so that will be very helpful!

I want to take a few minutes to walk you through the exact process I went through. This is a very easy, painless (other than the waiting) process.

Set Up
First, surf over to Imperfect Foods and set up an account. I am going to post a coupon code at the bottom of this post for you to use if you set up an account. Using the code gets you and me both a one-time $10 credit! So anyhow, once you have a username and password you will customize the box you want – box type, size and frequency. Here are the options for each category:

  • Box type – regular, all fruit, all veggie, organic
  • Box size – small, medium, large, extra large
  • Frequency – every week, every other week

For reference I have mine set as regular, medium and every other week. You can change these preferences at any time. Now, each box has to have a $30 minimum order each time you get one. I don’t know how it works with the larger boxes, but I had to select a standard “add on” from either pantry/grains or meats to supplement my veggie/fruit purchase. I selected the pantry/grains, but more on exactly how this works in a bit.

Next, you put in your payment information. You can cancel or pause your service at any time. There is no long-term commitment with this service.

Now you wait…

Selecting your box contents

The week before my box came I received an email informing me I could make my selections beginning on Friday afternoon and continuing through Sunday for my Wednesday delivery. As I mentioned in my first blog about this, I only have the option for Wednesday delivery. If you live in a larger town your options might be different than mine. I also had to wait quite a while for my first delivery because of the nation-wide lockdown we have been under. I’m sure the wait for your first box is not normally nearly so long.

The selection part of this was super easy. My cart was already filled with the recommended fruits, veggies and grains, but I could make changes to those. For example, my cart was preloaded with garlic and two kinds of oranges among other things. I had just purchased garlic and don’t care for oranges, so I was able to remove both of those by simply hitting the “minus” next to the item count. You can clearly see exactly what you are getting, how much and the price of each line item. Now here is the cool part – once I removed the two items I could even further customize my account by telling Imperfect Foods that I did not want the item RIGHT NOW (garlic) or that I NEVER wanted the food (oranges). The never foods will not be recommended or pre-loaded to my cart ever again! Very cool!

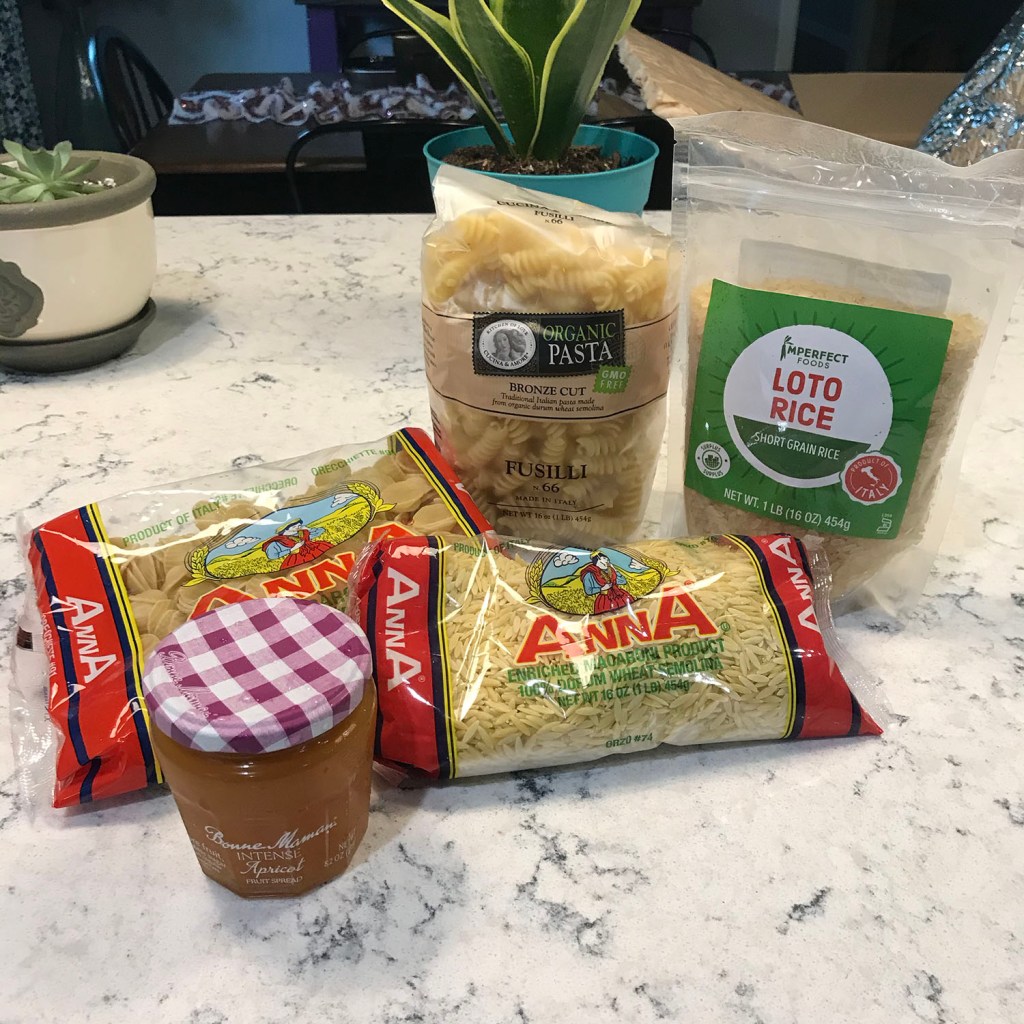
So, after those changes my cart total was at $18.47. Now I need to find $11.53 worth of additional items to add to my cart before it can ship. First, I cruised over to the produce section to see if there was anything else I wanted to order there. Not seeing anything that really interested me, I moved over to the pantry section. There I selected another pasta and an apricot fruit spread.

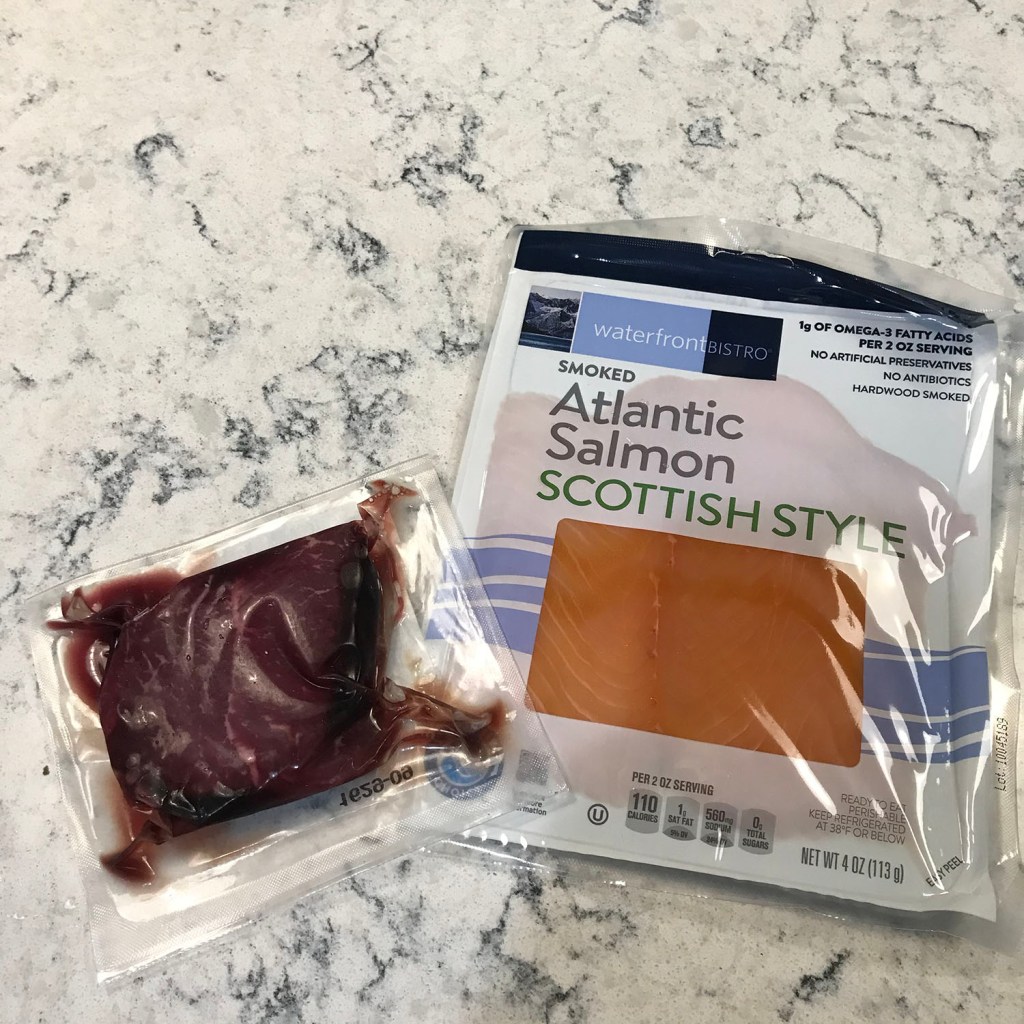
I did notice on the pantry/grain and meat sections it lists the reason for imperfection – at least this time around it seemed almost all of the items were listed because of overstock reasons. Ok, so with my two additional pantry orders my total is now at $23.45. Off to the meats section to finish this off. I picked a package of smoked salmon and a sirloin steak. This put me slightly over my $30 requirement, but there are no issues with going over, you just have to meet the minimum. I checked my cart one last time to ensure I was happy and then told them to ship it to me!

What I got

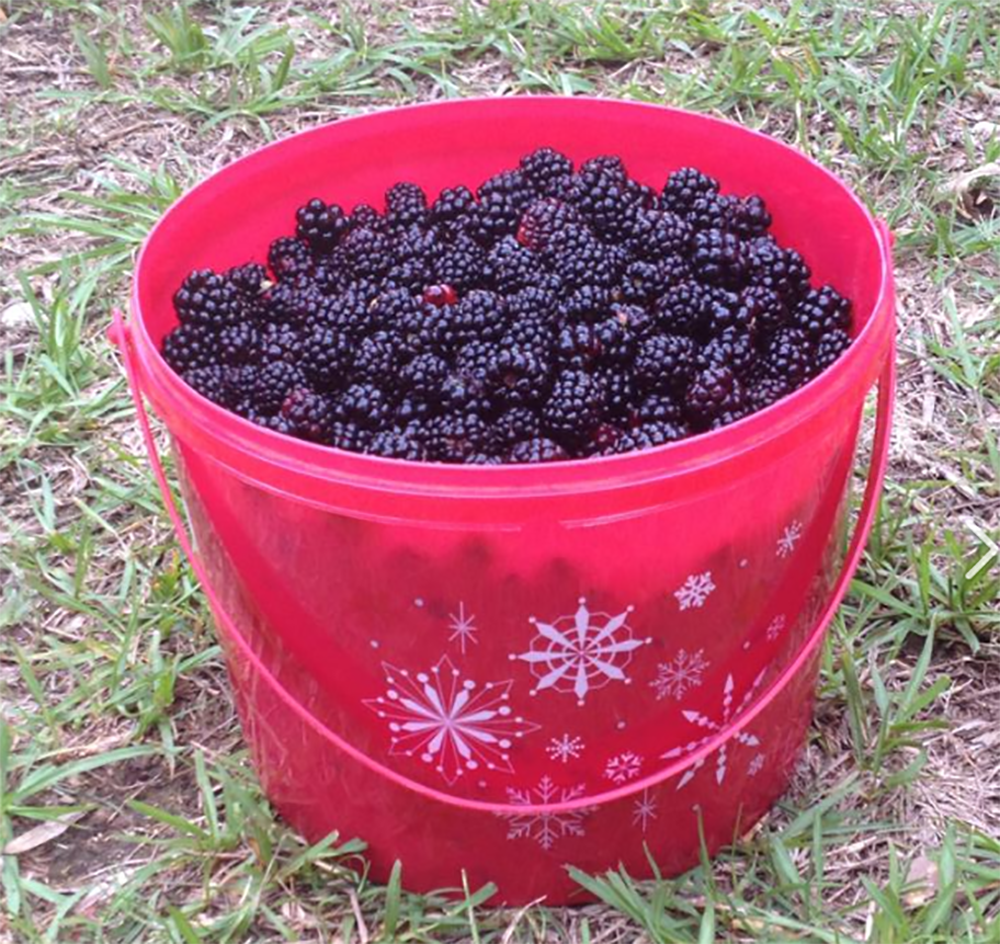
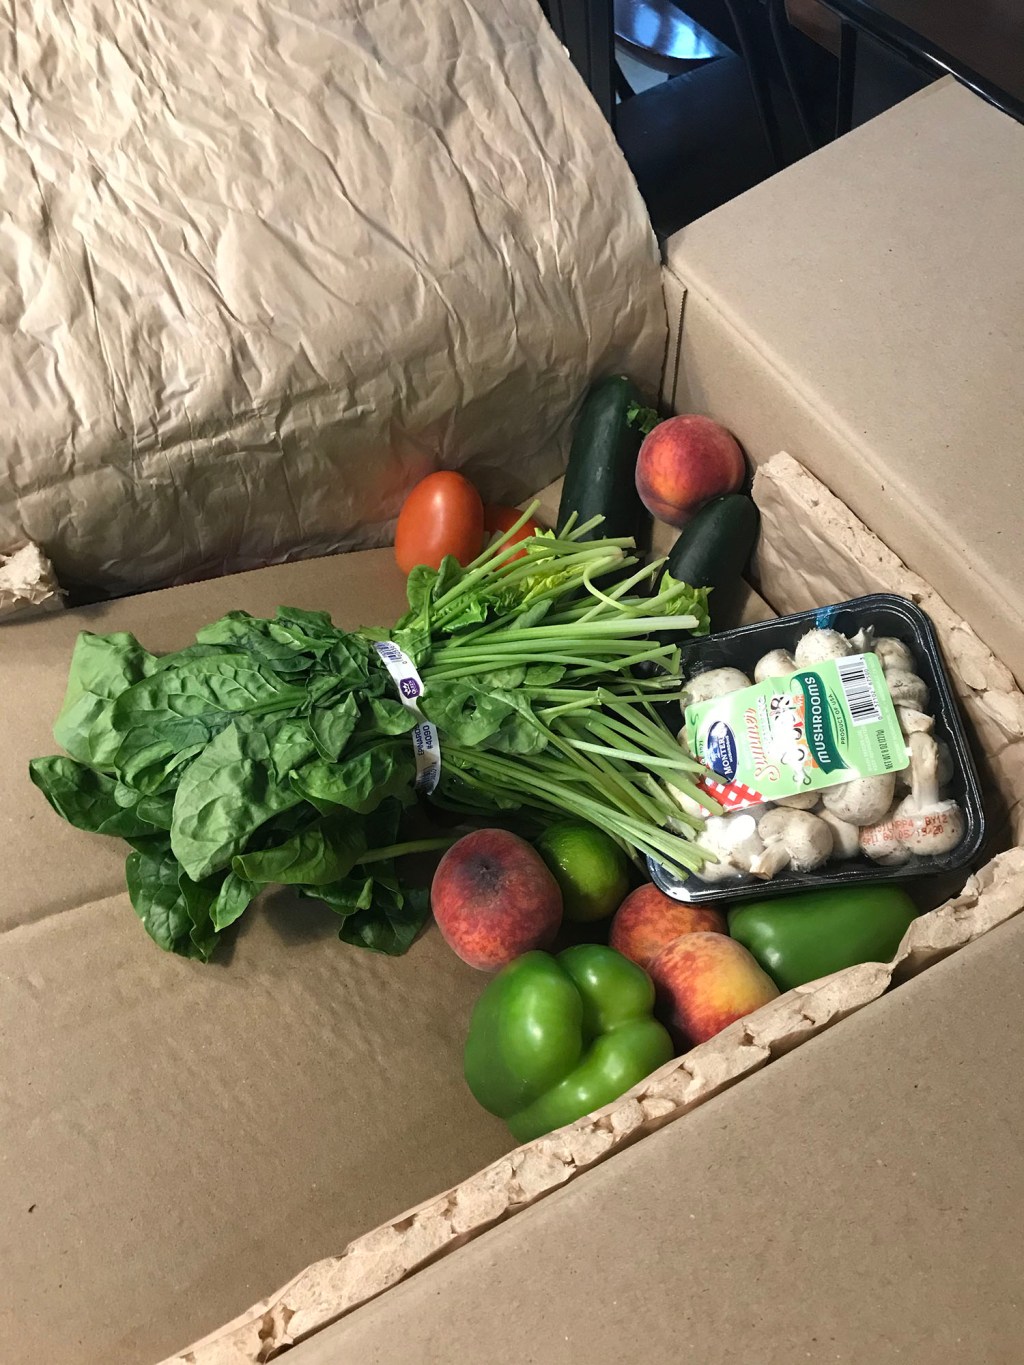
I could not wait to open my box when it got to my door to see how the produce looked! Here is what I received:

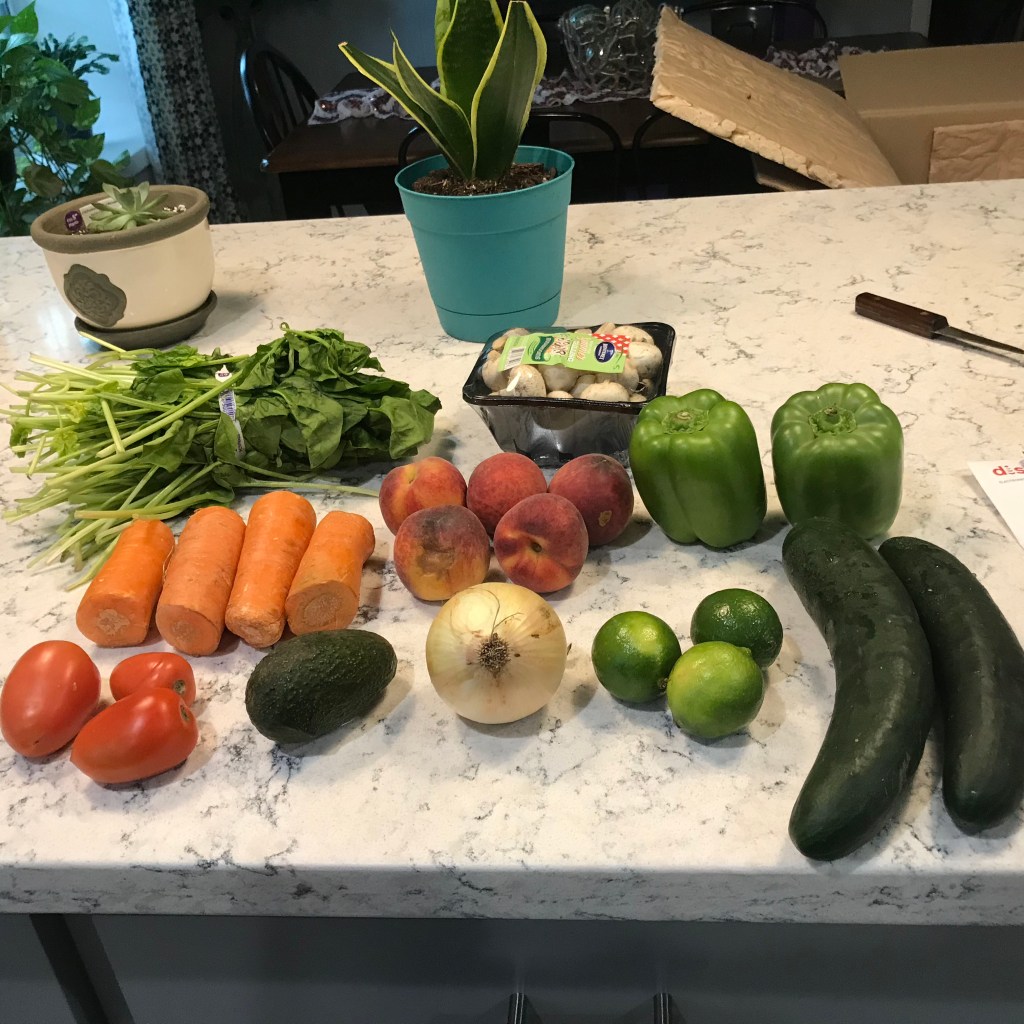
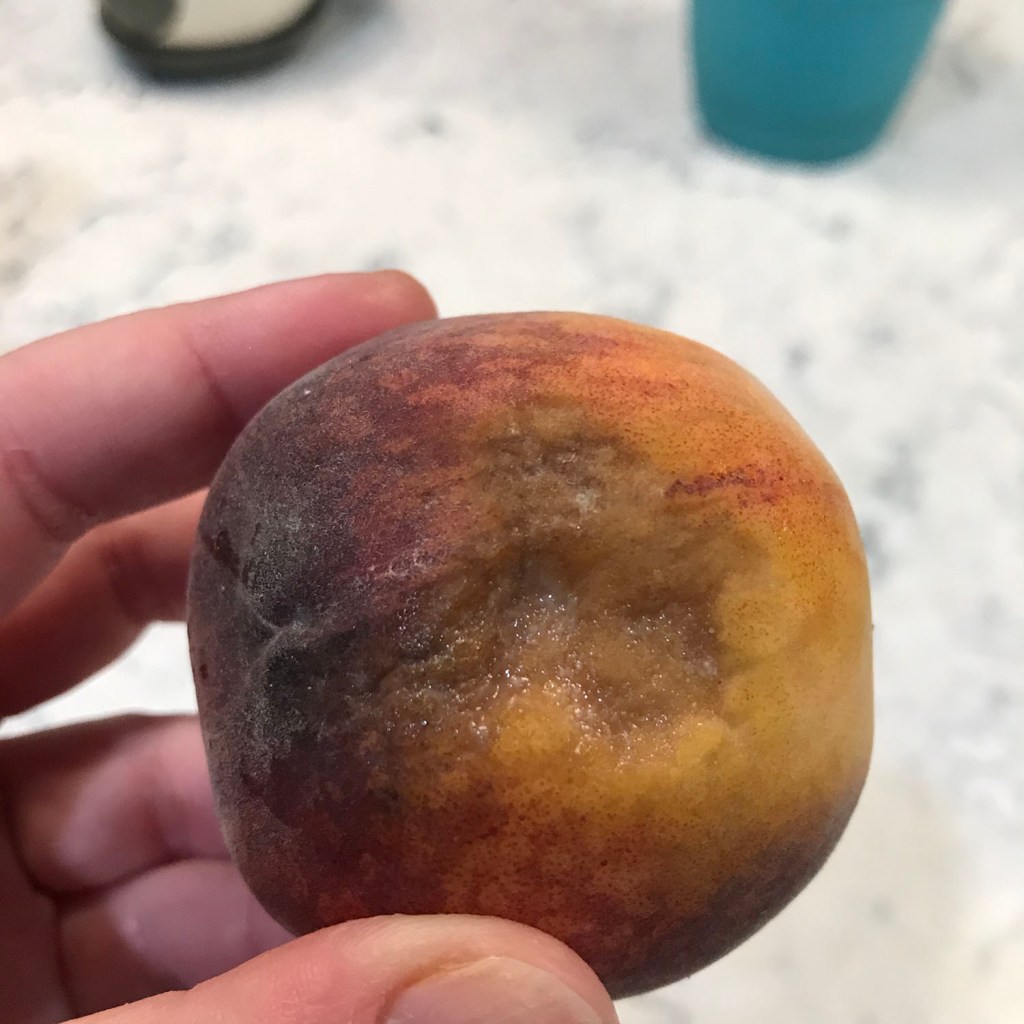
Overall, I was impressed with the quality of produce I received. I had one cucumber that was almost overripe and one peach that had a bruise. The tomatoes, avocados and peaches were a little undersized, which was likely why they ended up in this box. Overall though, the produce was beautiful!

The comparison
One of my biggest questions about this box was if it was a good deal. Here is quick breakdown I did with prices at Kroger, which is where I shop most pre-pandemic. On most of the pantry/grains and meats, I could not get the same brands locally, so I went with what looked the closest to what I received. I’ve highlighted the items that were cheaper in the store in red (I put the peaches in red because while the store was higher, the peaches from the box were much smaller than I would have gotten in the store). I could not even find loto rice anywhere around me, but finally found something that I could order online.

ProductImperfect Food costKroger cost
Conventional Onions (1 ct)$0.79 $0.50 each
Conventional Cucumber (2 ct) $0.89$0.50 each
Conventional Carrots (1 lb)$0.79 $0.95/ lb
Conventional Tomatoes (3 ct) $1.49$0.30 each
Conventional Green Bell Peppers (2 ct)$1.69$0.89 each
Conventional Avocados (2 ct)$1.59$0.79 each
Conventional Mushroom (8 oz) $2.59$2.19
Conventional Peaches (5 ct)$1.69$0.92 each
Conventional Limes (3 ct) $0.49$0.50 each
Conventional Spinach Bunch (1 ct) $1.99$0.99
Anna Orecchiette Pasta (16 oz)$0.99 $2.49
Anna Pasta Orzo$0.99$1.99
Cucina & Amore Pasta Fusilli (16 oz)$1.99$1.49
Imperfect Foods – Loto Rice (16 oz)$3.49$3/lb (bulk only)
Bonne Maman Intense Apricot Fruit Spread (8.2 oz)$2.99$4.59
Waterfront Bistro Smoked Atlantic Salmon Scottish Style (4 oz) – $4.99$7.49
Tyson Open Prairie Center Cut Top Sirloin Steak (5oz) $3.49$3.10 (bulk only)

Overall, I feel like the box was a good idea and I will keep receiving them for now. While I paid a little more for some items, my grand total came out about $4.45 less than if I had purchased in-store. I say “about” because I cannot buy the same brands and the same weights on all the items I received in my Imperfect Foods box, so the comparison isn’t exactly apples-to-apples. I started to incorporate the shipping/delivery charge, but ultimately decided not to since I have to drive 30 miles one way to go to Kroger and the prices at the stores in my town (a local grocery store and a regionally-local store) would be higher than Kroger. There is a WalMart in my town, but I HATE going there, so I feel like the convenience factor really comes in to play. 🙂

Final verdict
I’m calling it a win for me. This might not be ideal for someone that lives in or near a big city where community supported agriculture (CSA) or large farmers’ markets are available. In those instances, I would for sure suggest you support your local farmers when possible before going this route. For people like me where the local selection is limited, this is a great way supplement what can be purchased locally from local growers.

If you would like to try Imperfect Foods, use this link and you will receive a $10 credit on your first order. Full disclosure, I will receive a $10 credit as well if you use the above link.

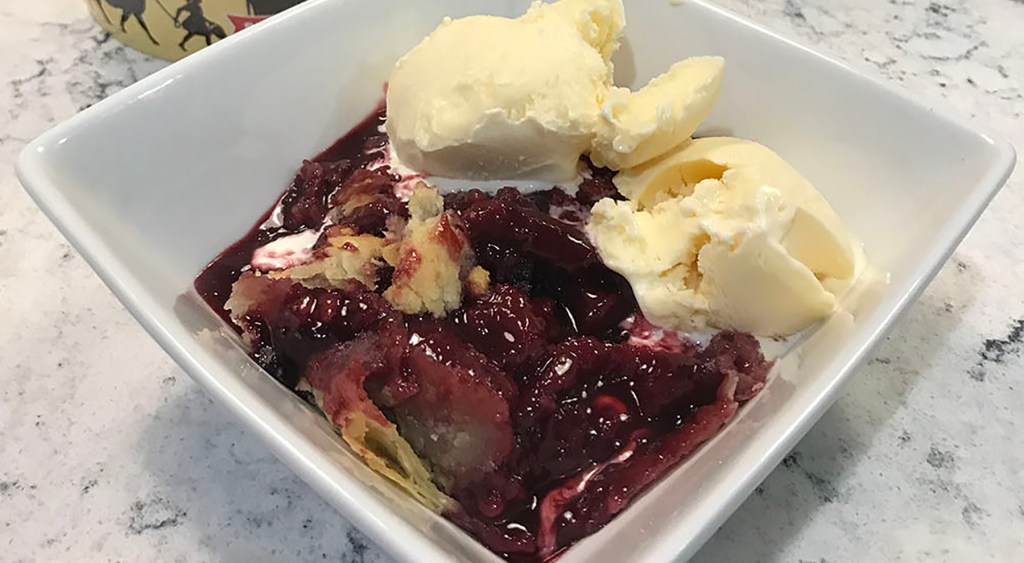
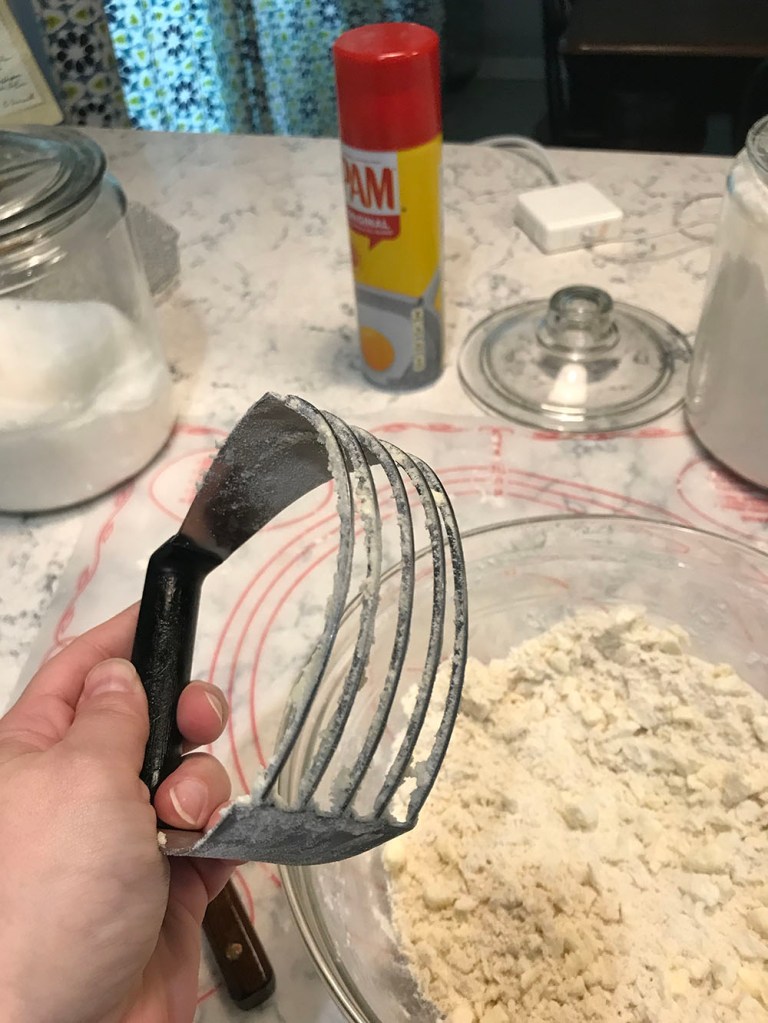
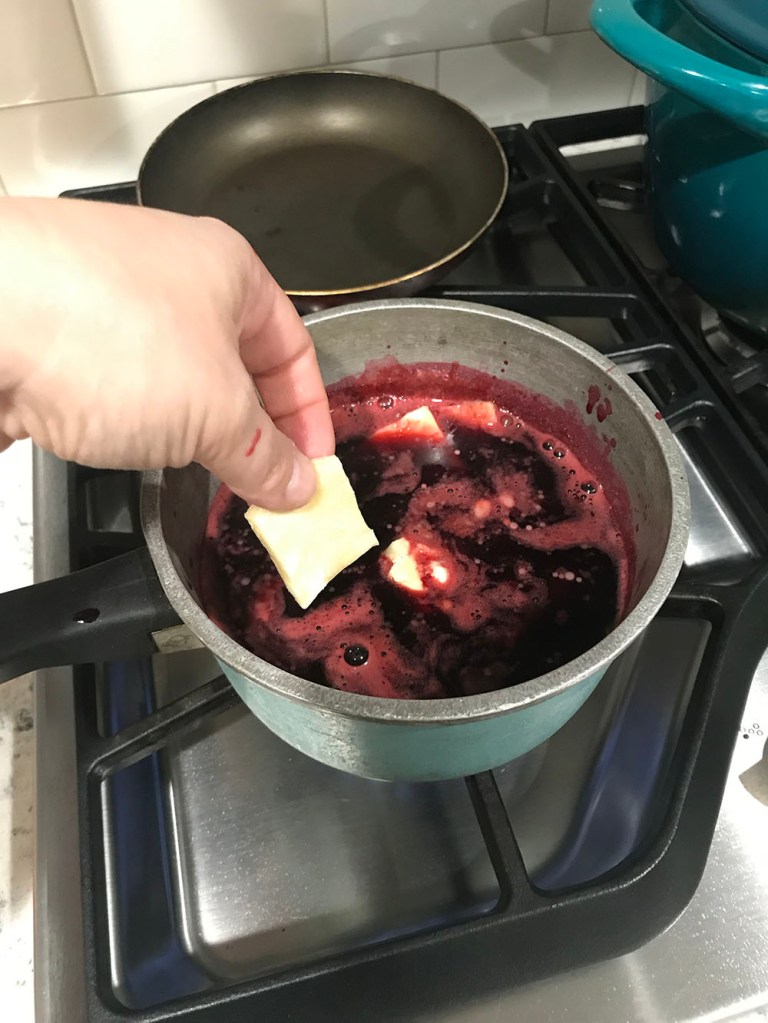
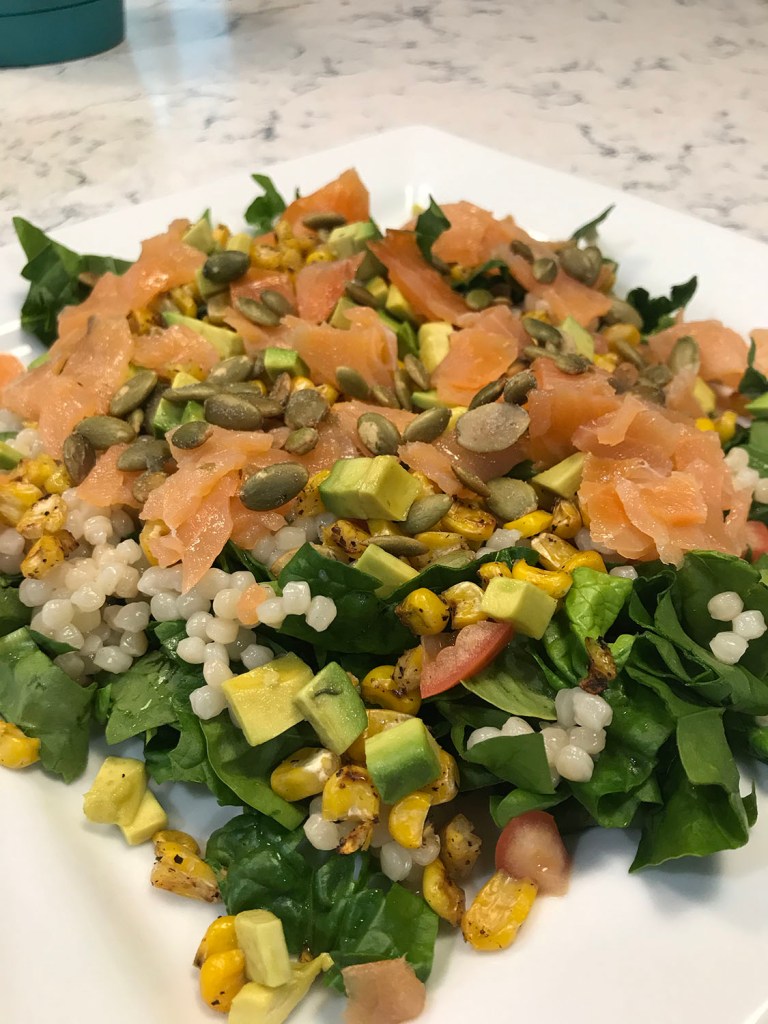
Here is a picture of the first meal I create with my food stuffs plus a few items from my pantry:

Spinach, smoked salmon, avocado, tomato, roasted corn, pepitas and pearl couscous

I hope this has been as educational for you as it has been for me! Happy snacking!

XOXO,
Misty

I’m back and have a new project!

Now I know it has been a hot minute (read seven months) since I last wrote a blog. I just got burned out and down-and-out about a lot of things, but seven weeks into work-from-home and I need a creative outlet.

Speaking of the pandemic we currently find ourselves in…
In many aspects this crisis has been rough on most of us emotionally, financially and mentally. And that is just talking about the ones of us that have not gotten sick or lost loved ones. That said, however, a few good things have come from this.

First, I feel like there is a greater outreach to God. I hope this is something that continues, but I fear it is just a temporary fix for many people – a reaching into the old medicine cabinet for a little Jesus when things get hard. If you are searching for an anchor in this storm of life, He is the answer. Always.

Second, I feel like we have been forced to slow down, rest, recharge and understand that life constantly in hustle mode might not be for the best. Side note: if you haven’t checked out To Hell with the Hustle  by Jefferson Bethke, you need to right now. This book changed my life! (Plus, the fact that the author liked my book review pretty much set me over the moon! You can read my book reviews on my Instagram page.)

Third, there has been a huge outreach to local farmers and livestock producers for locally-sourced food. Check out my Yankee-friend Jodi’s farm and all their exploits recently. This chick and her family amaze me every single day and I’m often near devastated I can’t help support her. Shipping food-stuffs from Pennsylvania to East Texas is hard though! She and her farming buddies have truly turned a near tragedy into this amazing story of community outreach and support. It honestly brings tears to my eyes sometimes. And let’s be real, a little jealously-like feeling to my heart. They are living the locally-sourced dream! This is something that is hugely close to my heart and it seems my passion for it grows every single day.

Now, living in the Loblollies of East Texas is right where my little heart is content. One thing that frustrates me at times though is that something like what Jodi has going on just doesn’t make as much sense here. Mainly because if someone cares about locally-sourced products, they grow or raise their own. I’m not certain there is a sound financial reason to try and build a community of local producers here.

I love supporting my local Farmers’ Market (I got some gorgeous fresh green beans this weekend that I’ve tried turning into Pickled Dilly Beans from Johnson Farms). I can get semi-local wine and beers thanks to Fredonia Brewing and Angelina Brewing in Nacogdoches and Lufkin. I have yet to find locally-sourced dairy or meat that is not in the Houston or Dallas area, which honestly at 2+ hours each is just too far to be considered local. And what is a girl to do when she wants something other than the standard honey, squash, zucchini, cucumbers, tomatoes, beans, peas, onions and peaches (I’m talking that are locally-grown). This small-town girl often has big-city desires when it comes to produce. The supermarket is an option, of course, but does that really help counteract the millions of pounds of food waste here in the United States or the farmers that are struggling right now because of shutdowns?

Several months ago, I researched a company called Imperfect Foods. The San Francisco-based group promises to “deliver seasonal, cosmetically imperfect produce to your house at affordable prices.” This is food they claim would otherwise go to waste. When I first researched the company, I was super bummed to find out they did not even come close to delivering to my area. Dang rural setting! I found out a few weeks ago, however, they have vastly expanded their reach to serve more people. I can only receive deliveries once a week on Wednesdays, but that is ok. I have currently set myself up for a medium box with every-other-week delivery. The cost is a minimum $30 spend with a $5.99 delivery fee.

I am going to do a more in-dept review post once the box gets here, but I wanted to use this time to talk about the pros and cons of these boxes. While the claims sound great, are they really? I did some digging and lots of reading and found several arguments AGAINST these services (Hungry Harvest and Misfit Market are two other subscription services with similar claims). One of the biggest negative claims is that the boxes are expensive. So far I don’t think that is going to be true, but I’ll post the breakdown of my box’s cost when I receive it next week.

The next thing nay-sayers complain about is how these companies are only acerbating the problem of overproduction by monetizing and incentivizing farmers to grow more product. Meaning, much of the produce they sell via subscription would not have, in fact, gone to waste but would have been sold to manufacturers of canned vegetables, soups, frozen chopped fruit and veg, jams, etc. Maybe true, maybe not. Farmers seem to be pretty quiet on this and the subscription companies are mum on who their suppliers are.

One of the loudest negative claims I have read is how subscriptions divert donations to local food banks and continues to put money in the pocket of Big Ag. This claim gets tricky and sticky fast. According to the USDA, in 2018, family farms accounted for nearly 98 percent of all U.S. farms. The breakdown between small and large family-owned farms is where critics bite though. Of the 98 percent of family-owned farms, small-family farms (less than $350,000 gross cash farm income a year) account for 90 percent of the total. Large-scale family farms (more than $1 million gross cash farm income) account for approximately 3% of family-owned farms, but they produce more than 40 percent of total production. BUT, they are still family-owned farms. One of the main reasons they are able to produce such large quantities of produce is specialization. Meaning, they focus all of the efforts and energy on one or two very specific crops or livestock. It is a business decision usually brought on by the harvests’ value and the input costs, but sometimes because of historical family reasons as well.

And even though we sometimes forget, farms are a business. I deeply believe business owners – big and small – should be allowed to make a profit on the items they produce, whether that be services or goods. To me this seems like a very common sense thought process, but apparently it is not. It is inconceivable to me why anyone would want to – or how they COULD – operate a business of any kind or size at a break-even or loss year after year. I believe Corporate Social Responsibility (CSR) is important and all businesses should strive to give back to their communities and the nation, but not at the detriment of the company or its employees. Farmers are business owners. They might not walk around in a suit and tie, drive an expensive luxury car or live in a big city high-rise, but their farm is often their family’s source of income. They should not be expected to sacrifice potential profits to donate food unless they feel driven to do so. These additional profits could mean the difference between keeping small-family owned farms operating or having to sell out as so many have had to do over the years. The agriculture world works on a narrow profit margin already. Why, I ask, should they not be allowed to add a little breathing room to that margin when possible?

Farmers like Tuscarora Organic Growers Cooperative believe these “ugly produce” companies have done just that. They have given them a way to increase profits on the 20% of crops that does not meet rigid grocery store and restaurant standards. You can read more of their interview here. Inversely, many local farmers argue against these subscriptions by saying they make middle-class buyers feel they are making ethical buying decisions while in reality ignoring cooperatives and local producers. 

Now, do I think these start-up “ugly-produce” subscription companies are going to fix all the woes of our broken food chain? I give you a resounding and firm absolutely not. I do believe, however, they are trying to fix some of the problems. For me, participating in a local CSA (community-supported agriculture) is not an option. They don’t exist. I tried growing my own  baby garden this year and it not going so well. Plus, in a normal, non-pandemic world I travel a lot and gardens need attention. I don’t believe having this subscription box will stop me going to the local farmers’ market, but it will keep me from going to a supermarket. Again, I’m more focused on items I can’t source locally rather than buying things that I can already get here from our local farmers.

One thing I really like about this box is you can go in and select exactly what you want to receive. Already have garlic, take that out of your virtual cart for this time! You can also cancel or pause your service at any time. More to come when my first box gets here! I just can’t wait!!! In the meantime, think about your food chain. Do you know where your food comes from? Wal-Mart, Amazon, Kroger or Trader Joe’s is not really the answer I’m looking for. I’m taking do you know the person that is tending the plants, livestock, eggs and dairy you are eating/drinking? If the answer is no, is there a way you could? This pandemic has shown us many things. Including just how very fragile our food chain truly is. Source local foods when you can.

XOXO,
Misty

Traveling in Colorado – Part 2

The Great Sand Dunes…ever heard of them? Nope? Well neither had I. The location was listed on the Things You Must See in the United States bucket list I found and it seemed like fun.

Now Alamosa, Colorado, is about a four hour drive from Denver, but let me tell you, this place it worth it. My mind still can’t fully comprehend all that I saw and when I got my pictures downloaded it is even more boggled. I’m not going to write too much, other than to warn you about photo overload (I couldn’t pick just one or two) and to tell you that I did NO photo editing to these other than resizing them for the web and adding the watermarks. I didn’t adjust the colors, change the curves or mess with the clarity. There are also no filters — just the images straight off my trusty Canon Rebel.

Also, sorry about the watermarks, but people can be jerks and can take things that don’t belong to them and claim it as their own. I worked hard for these images and am not giving them up without a fight! 🙂

It is about a 20 mile drive down this road…beautiful scenery up ahead.

The dunes are kinda hidden behind this wall of trees. And then…

You can walk out as far as your body can go, but there are no vehicles or ATVs allowed on the sand. I got about a mile out in the ankle deep sand before I wore smooth out and still had to slog the mile back. Holy cow was it worth the sore muscles though!

See the tiny people!?! They were “sand boarding” down the dunes!

Again…no retouching. It just LOOKS like a painting!

If you get a chance, it is worth the four hour drive down from Denver. My legs may never forgive me, but I coming back someday and I’m making it to the top next time!

I followed up the trip with supper and a drink at San Luis Valley Brewing. The ruben was excellent (I forgot a picture) and the Valle Caliente Green Chile Lager was a little strange…I didn’t expect spicy beer to be a thing.

Love, Misty

Traveling in Colorado

What a week this has been! It has been a while since I blogged. Honestly, my head has just not been in the right place, but this is the first fun trip I’ve been on in forever, so I just had to share!

When you travel as often as I do, it is inevitable that weird things are going to happen and they are often hilarious. I love sharing the weird, funny and stupid, so here goes ! I started off this week in L.A. on Monday for a conference focusing on Cal/OSHA — stimulating stuff. From L.A. I caught a flight over to Denver on Wednesday afternoon for meetings on Thursday and Friday with plans to stay for some sightseeing over the weekend.

When I left L.A. it was 80+ degrees in Denver. Keep in mind, this is a fairly short flight, only about 2.5 hours. When we got about 25 miles out the pilot came on and told us the weather was changing rapidly in Denver and we were going to circle for a bit because the wind was gusting at 50 mph. After circling the city for about 15 minutes, the pilot comes back on to tell us we need to buckle up. The winds have now increased to 55 mph, but we’re apparently doing this. Ok…strap in extra tight, mentally brace and I’m ready.

This dude apparently had extensive training in high winds, was used to landing on small ships or dropping Navy SEALS in dangerous territory, because our descent and landing was smoother than I’ve had in Chicago on a perfectly clear day! By the time I’ve retrieved my luggage and gotten to the car rental place it is pitch black and 40 degrees. Yep, a forty degree temp drop in 2.5 hours. And the wind in still insane. Awesome.

I get to my hotel with a bite to eat about 8 p.m. and settle in for the night. Now OhOh (aka, Mama) has been telling me for days before my trip that it is going to snow in Denver while I’m there. I HEARD her tell me this multiple times, but clearly I didn’t register what she was saying or didn’t believe her or something. All I really saw was that it was supposed to be in the 70s this weekend. So when I packed shoes, I packed my tennis shoes for the gym and weekend and a pair of open toe wedges for meetings. Yep, you read that right, open toe wedges. You see where this is going???

I woke up to this on Thursday morning:

Outside my hotel window

Yep, that is three – THREE – inches of fresh snow. It is 13 degrees outside. Apparently Denver set a record for dropping a whopping 70 degrees in 34 hours. I REALLY could have done without being a part of this particular record. My meeting is at a building less than four miles away at noon. I got this. Seriously, I got this…maybe…

I get dressed – tennis shoes, because you know the open toe wedges and all -and keep telling myself that I’ve got this, because mind over matter and all that. Then I walk out to my car:

Oh, what fresh hell is this?!?! The silver one covered in what is actually about 6-8 inches of fresh snow is mine. What do I do now? I open the door because that is the next step, right? WRONG! All the accumulated snow promptly covered the driver’s seat, the dash and floor board. DANG IT!

For the record, I don’t know how these people open their doors and snow not get in everywhere. I watched several times and it is magic or something. There is something I don’t know or understand about door opening in the snow. Maybe you have to live here for them to share — like it is a rite of passage or something.

I go ahead and load my stuff up and find this little brush thingy the rental company thoughtfully left in the car! I use the brush to get as much of the snow OUT of the car as possible and proceed to brush as much as I can off the windows and windshield. I get the car cranked and the heat going. Turn on the wipers…nothing. They are frozen solid to the windshield. Oh! So THAT is why all the other cars in the parking lot had the wipers sticking up! Lovely. I sit, shivering, while the windshield heats up enough to free the wipers and notice the other end of the brush thingy is actually a scraper! YES! So back out in the cold, to scrape the windshield. I do this until a crackhead, that is yelling random curse words, holding his head and swinging it around shows up, at which point I get in the car and lock the doors. I sit in the car for about 15 minutes before it is drivable. At this point I am going to be late to my meeting, so I text my contact to tell them I’m REALLY trying, but am currently the proud owner of the don’t-know-how-to-handle-this struggle bus.

I finally get the windows clear enough to get on the road. I have no further mishaps on my way to the meeting, where I show up late, sporting tennis shoes with my dress slacks, feet, ears and fingers numb (I didn’t bring appropriate footwear, do you think I brought a hat and gloves???) and apologizing for being late because my dumb Southern butt — which is wet, by the way, from the snow I couldn’t get out of the seat — had quite the time figuring out how to get a car ready to drive in the snow. At least the team I was meeting with thought I was hilarious and then felt bad because it didn’t dawn on them that someone should have come and gotten me because the chances of me knowing how to do this was slim to none. The snow was mostly gone by the afternoon, thank goodness. I’m pretty sure my poor guardian angel was stressed, anxious, panicked and thinking they were going to need more backup than was possible if the snow had stuck around.

I get back to the hotel after the meeting at about 5:30 and finish brushing the rest of the snow off the car (I thought it would blow off or melt? Apparently that was wrong…) and a dang coyote runs through the parking lot! WHAT IS HAPPENING!?!?!

On Friday my meeting was to start at 1 p.m., so I stopped for lunch a this Cajun cafe that everyone was just raving about. The gumbo and étouffée supposedly rivaled Commander’s Palace and the beignets put Cafe Du Monde to shame.

For those of you that have not had the luxury of visiting New Orleans, Commander’s Palace and Cafe Du Monde are the king and queen of creole cooking. Both have been in business since the late 1800s. I’m talking real deal, legit food here. So hearing these claims, I’ve got some reservations, but I’m willing to give it a try.

I ended up and ordered the crawfish étouffée because the gumbo has okra in it and in my book okra is only good fried or pickled. This gorgeous plate comes out and I’m impressed!

And after that is where it all went wrong. The roux had a strange Italian flavor and nothing about the dish was spicy at all. They might have used salt and pepper, but no Cajun seasonings went near that pot. It was served with cornbread – that was full of sugar. These people are clearly heathens. After this disaster, I just didn’t have the heart to order the beignets. They might have been lovely, but there is no way they were on the same level of CDM. I just couldn’t take the disappointment. So, if you are in Denver, skip the Cajun food. They don’t get it. They think they do, the locals think they do, but they don’t. Get yourself down to NOLA if you want Cajun, or at least somewhere close to Louisiana.

After my meeting, I was off the company clock and headed down to Colorado Springs. The drive was only a little over an hour, but going down the night before allowed me to get an early start on my sight seeing!

I get up early Saturday morning, get dressed and head to the gym to start the day right! It was packed with little old men — every single machine. Little did I know, though, God knew I didn’t need to get on the treadmill. He had other plans for me.

I go back to my room, get dressed and packed up, grab breakfast and set out for Garden of the Gods.

If you haven’t heard of this place, it is simply stunning…

I quickly realize I need to park the car and hike to see everything up close! Almost four hours later I decide it is time to head back and on to the next thing, but oh my goodness did God show out on this one! This place is AMAZING! Put it on your list, but be prepared to hike, climb, huff and puff. The altitude is only 1,950 ft, but it hits you hard if you are from a little above sea level. The morning sun was REALLY bright on Saturday, but the pictures are still stunning even with some not-so-great lighting.

The Three Graces

I can’t tell what they all are and not everything was labeled, but you get the idea that it was beautiful.

I left Garden of the Gods and headed over to Pikes Peak. Now, I didn’t really know what to expect, but I did NOT expect to wait in line for more than 45 minutes to pay to drive on a highway. I was about ready to call it quits, but I just kept telling myself that it would be fine and I didn’t have other plans for the day. Overall, I’m glad I went to the top even though the whole thing is currently under construction and a total wreck. Once I finally got on Pikes Peak Highway, it took about an hour or so to get to the top. I pulled over at mile 16 to jump on a shuttle that took me the last two miles up. I did really well driving up until about mile 14 when the switch backs got really sharp and the incline was crazy. You literally felt like you were about to drive off the edge of the world!

Like I said, there was construction everywhere up at the summit, but the view was just stunning!

The summit of Pikes Peak

Proof I made it!

Now, I know altitude sickness is a real thing, but I had not ever experienced it until I got to the very top of Pikes Peak. Within minutes I had a splitting headache, was nauseous and dizzy, and my muscles felt like water. Needless to say, I didn’t stay over a few minutes before I jumped back on the shuttle and got back down to about 12,000 ft. Almost immediately I felt almost normal again, even though a dull headache lingered the rest of the day. I cannot imagine how bad it would have been if I had not been in Denver to acclimate for several days prior to going up. If you travel to places that are much higher in altitude than you are used to, be aware, drink lots of water and take it easy until you feel steady!

Like I said though, once I got back to mile 16 I left mostly normal again and took the opportunity to do a little hiking and climbing!

I HEART sun flares 🙂

Overall, it was an amazing day! I am beyond blessed to be able to see and experience so many things in this country. I don’t wear a fitness tracker, but my phone says I walked more than five miles and climbed 30 flights of stairs today. My legs and lungs say that it was more though! More adventures to come soon!

Love, Misty

Ube Chiffon Cake

I’m currently obsessed with chiffon cakes. They are a light and fluffy cross between a butter cake and an angel food cake. The most interesting thing about chiffon cakes is that they are made with a non-solid fat, such as vegetable oil, to give them a softer mouthfeel. Just for reference, butter is an example of a solid fat. In addition to the use of oil over butter, they also use whipped egg whites to give the cake an airy and light texture.

While looking for a chiffon cake recipe for a true experiment (hopefully I’ll be ready to share that one soon), I found one for an “ube” chiffon cake. Ube (pronounced OOO-beh) is a species of yam that are vivid violet-purple to bright lavender in color. They have a slightly nutty, vanilla flavor and are more mellow in taste than their orange relatives, the sweet potato. Ube is originally from the Philippines, but has become naturalized throughout the tropical South America, Africa, Australia and southeastern U.S. Ube has seen quite the trend recently due to its photo-worthy beautiful coloring and the ability to make the foods it is used in all shades of purple depending on the concentration.

I had eaten ube sorbet at this awesome restaurant in Chicago called Roka Akor. (FYI, they have locations in Arizona (Scottsdale), California (San Francisco), Illinois (Chicago, Old Orchard and Oak Brook) and Texas (Houston). If you find yourself close to one of these locations, go. Seriously. It is worth the splurge to go with a friend and have the Chef’s Tasting Menu.)

So back to chiffon cakes – they have several steps, but don’t be intimidated. I changed my recipe up quite a bit from the one I found, but I had really good luck with this one on the first try. Begin this recipe by separating seven eggs. Eggs are easier to separate when cold because the yolks are firmer and less likely to break. To get truly stiff peaks you cannot have any yolk in your whites, so be careful when separating. Once the eggs are separated, allow them to come to room temperature for about 30 minutes. Room temperature egg whites will whip into peaks much faster than cold whites.

All the stuff

Once the eggs are the correct temperature, place the yolks in a large bowl and whisk them until smooth. Add 1 ¼ cup of sugar and mix well. Once the sugar is incorporated, add ½ cup of whole milk, ¼ cup buttermilk, ½ cup vegetable oil and 3 teaspoons ube favoring. Whisk this mixture until all the ingredients are thoroughly combined.

Side note: the original recipe called for water instead of milk or buttermilk, but why use water when either of these milks provides so much more “homemade” flavor to a cake?!? I used a combination because buttermilk alone can result in a drier cake. You could easily use ¾ cup water, ¾ cup whole milk or ¾ cup, plus a little buttermilk if you wanted to try the difference for yourself.

For my ube flavoring I used McCormick flavoring I ordered on Amazon (again, small town, not a lot of options when it comes to unusual foods). I was excited because I did not think this particular brand contained food coloring, but I was wrong. I found instructions on how to make your own flavoring using whole ube yams, but, of course, I could not find those. I will be on the lookout for them the next few months when I am traveling and will report back though!   

When adding the dry ingredients, I prefer to sift them into the wet ingredients to ensure there are no lumps in the cake. I use a hand strainer with medium mesh. Place two cups cake flour, three teaspoons baking powder and one teaspoon salt in the strainer and gently bump the edge against your palm to shake everything into the wet mixture. Break up any lumps that may remain in the strainer. Using a spatula, fold everything together until well incorporated. Set bowl aside.

Side note: cake flour vs all-purpose flour. The biggest difference between cake flour and AP flour is the protein content. AP flour has a slightly higher protein content, which is what turns into gluten. Cake flour will result in a more tender texture with a finer crumb and a slightly better rise than AP flour. You can substitute AP flour though, there will just be a little texture and rise difference.

Now it is time to work on the egg whites. Place all the whites in a mixing bowl (I prefer to use my KitchenAid Artisan Stand Mixer for this – if you don’t have one…well, look into that because they make cooking soooooo much easier and more fun!) and add ¼ teaspoon cream of tartar. With the whisk attachment in place, turn the mixer to medium-high until the egg whites are fluffy. Slowly add in ¼ cup of sugar, about a tablespoon at a time, until stiff peaks form. I like to stop my mixer a few times during the process to scrape down the sides of my bowl to make sure I have all the sugar incorporated. If you aren’t sure what stiff peaks means, check out this picture:

Photo credit: Snipped from Martha Stewart’s Everyday Food

When you lift the whisk out of the whites you want the peak to keep its shape and not droop at the top.

Take about a third of the whites and place them in the batter mixture. GENTLY fold in the whites, only stirring just enough to mix everything together. If you stir too much or too vigorously the whites will deflate and your cake will not rise appropriately. Once incorporated, add another third and repeat until all whites are thoroughly incorporated.

Pour the batter into an UNGREASED tube pan – learn from my mistakes, if you grease the pan, the cake won’t rise, and you get a tough, dry cake doughnut instead of a light, fluffy, beautiful chiffon cake. Apparently, the cake needs to “climb” the walls of the pan and a greased pan will not allow this. Bake the cake at 350 degrees until a long toothpick inserted in the cake comes out clean, about 55-65 minutes.

It looks like there is too much batter and it is going to puff out, but this is my second attempt with this recipe and no overflows to date.

Now this is the really weird part. You need to cool this cake, upside down, for about 30 minutes. Since the cake will puff up and you don’t want to squish it, you will need to either place cups along the lip to let it cool (this seems like a total disaster waiting to happen in my kitchen) or you can place it on a wine bottle.

There is a cake in there!

The bottle needs to have something in it to be sturdy enough to hold the cake and pan. Don’t worry! I’m not ruining a perfectly good bottle of wine. This particular bottle was given to me years ago as part of a matching set. The wine was TERRIBLE, but I never threw this bottle out (read: forgetful, lazy, resourceful), so it has become my chiffon-cake-cooling-bottle. If you don’t have a gross, not-going-to-drink-it bottle you are willing to sacrifice for this purpose, I would recommend at least adding some water to an empty bottle.

Once the cake has cooled about 30 minutes, unmold it from the pan and allow it to cool, upright, on a wire rack until totally cool.

At this point you can either make a glaze for the cake or trim it up and frost it. I opted for the second route, so I flattened out the top and cut the cake in half to make two layers. I creamed half a cup of room temperature unsalted butter with two cups of powdered sugar with the whisk attachment on my mixer. I added one tablespoon of cream and whisked until incorporated. Then, I added one teaspoon of ube flavoring and whisked until smooth. For this particular time, this made a frosting that was the perfect consistency for spreading, but you might need to add a bit more cream or powdered sugar to get it just right. Frost the cake and enjoy this beautiful, purple creation!!! It got solid thumbs up from all of my taste testers!  

How pretty and purple!!!

Ube Chiffon Cake
Cake:
7 eggs, divided and at room temperature
1 ½ cup sugar, divided
½ cup whole milk
¼ cup buttermilk
½ cup oil
3 tsp ube flavoring
2 cups cake flour
3 tsp baking powder
1 tsp salt
¼ cream of tartar

Preheat oven to 350°. In a large bowl, whisk egg yolks until smooth. Add 1 ½ cup sugar to yolks and mix well. Add milk, buttermilk, oil and flavoring to egg mixture and whisk until smooth. Sift flour, salt and baking powder into yolk mixture, ensuring there are no lumps. Mix until smooth. Set aside.

In the bowl of a mixer, whisk egg whites and cream of tartar until foamy. Slowly add ¼ cup sugar, 1 TBS at a time, until stiff peaks form, scraping down sides at times.

Very gently, add a third of egg whites to batter and fold in until just incorporated. Continue this until all egg whites are just mixed, being careful to not over mix and deflate the egg whites. Pour batter into an ungreased tube pan. Bake at 350° for 55-65 minutes or until a toothpick inserted in the center comes out clean. Remove from oven and invert to cool for 30 minutes. After 30 minutes, unmold from pan and cool completely, upright, on a wire rack. Frost or glaze if desired. 

Butter cream frosting:
½ cup unsalted butter, room temperature
2 cups powdered sugar
1 TBS cream
1 tsp ube flavoring

Using a whisk attachment on your mixer, cream butter and powdered sugar until smooth. Add 1 TBS cream and beat smooth. Add 1 tsp ube flavoring and beat smooth. Add additional cream or powdered sugar to reach the desired spreading consistency.  Frost cake.

There you go! See easy as…well, cake!

Love, Misty

Cedar trunk remake

My remodel and DIY projects are hit or miss at best. I almost always have fun with them, but they aren’t always successful. A while ago (read, about three years) I bought this awesome trunk at an estate sale next door for $12.50. I figured I could wipe it down and use it as is and was super excited to get it home. I borrowed a dolly and dollied it across the yard and parked it in the entry way (if you haven’t visited me, my house is huge and I have tons of space I don’t visit regularly…out of sight, out of mind and all) where it lived for about six months. 

I finally decided to work on it and opened it up to find this – interesting, that looks like cedar! Explains the lack of bugs.

I got a wet rag and soap to clean it up and…nothing. This grime was not budging. And it didn’t budge through soap, alcohol (on it, not me drinking), ZEP (I didn’t think ANYTHING could resist ZEP!), acetone and I don’t know what all else. It was filthy and was determined to stay that way. I regrouped and decided to just take the leather off and see what was underneath.

Holy moly! This thing was beautiful under that gross faux leather! I spent days trying to pull all the upholstery tacks out and finally after three bloody hands got mad and put it out in the sunroom…where it stayed until I got tired of looking at it moved it to the storage room where it stayed for about a year. About six months ago I decided to revisit this project (again) and drug it all out. I finally got all the tacks out of the trunk itself and decided to hold off on the lid. 

The next step was to get the thick varnish off so I could try to remove the scratches, glue and gunk. I grabbed my hand-dandy hand sander and some fine grit paper and went after it. And promptly received a resounding NOPE from the varnish. I changed out to a course grit paper and only managed to ruin about three pieces with no discernible difference to the varnish. UGH! 

Back to the store to buy some varnish remover. Which did absolutely nothing at all to whatever kind of space age, apocalyptic-proof super varnish these people used. This resulted in me once again angry and the trunk back in the shed for about six months (do you see a trend here yet???). 

About a month ago, I decided I was once again going to be brave – and I had apparently forgotten all the pain, sweat and literal blood I had already put into this this – and try once again to refinish this trunk. 

I did lots of research and found this amazing elixir from above that will eat through anything.  Like…anything, so be careful. It has apparently been bought out by Minwax, so I don’t know if it works exactly the same, but I hope so because this stuff was amazing!

I used a little plastic container I could trash afterward, about 50 latex gloves, wire wool and several strips of cut up t-shirt. The varnish on this trunk was so thick and gooey that I could only clean small sections at a time. I started out dipping my wool in the furniture refinisher and gently rubbing it in a circle about the size of a salad plate until the varnish started coming up. I would then wipe it clean with the strips of t-shirt. I never tried a cloth that had any nap, or fuzzies on it, but I’m fairly certain that would have been a disaster. The t-shirt fabric doesn’t pill or leave behind fuzzies and since it was a repurpose anyway, I did not mind just throwing them away when I was done. I kept repeating this process until I had one whole side done. I would then let the trunk totally dry for about 30 minutes to an hour. After the trunk had dried, I would repeat the process again with fresh furniture refinisher, gloves, wire wool and fabric strips. I kept up this process until each side was completely clean and smooth to the touch. This process took me about a week to get all four sides of the trunk totally clean since I can only work on it after work in the evenings. 

I got it all wiped down and then sprayed a little of this orange furniture polish on the trunk and Oh. My. Beautiful! 

Now to tackle the top. Unfortunately the lid had much more damage than the actual trunk itself and I decided that instead of spending hours trying to salvage what was almost guaranteed to be a loss, I would just cover the top. I found this beautiful upholstery fabric at Hobby Lobby and I got a roll of 2” padding. 

To cover the lid, I first trimmed my padding to fit the top with an X-Acto knife. Once trimmed, I laid the padding on the fabric with the printed side down about three and a half inches away from the fabric edge. That would give me enough space to pull the fabric around the padding and up to the trunk lid, as well as enough to fold under about a quarter to half an inch so I didn’t have to stitch the edge to ensure my fabric didn’t ravel. I took my handy staple gun and placed staples all down one long side of the lid. I then moved to the other long side. I made sure I pulled the fabric snug, but not tight because I wanted to make sure I still had sharp, crisp edges on my padding. If I had pulled the fabric taunt it would have rounded out the padding edges. After finishing both long sides, I carefully turned the corners and stapled the short ends as well. 

I bought some new hinges for the lid and decided to put some feet on it to give a little more height. I got these unfinished furniture feet online from Amazon for about $18 for the set of four and I painted them turquoise to give a pop of color. I started out by attaching the feet with wood screws and then made sure to add floor protectors of the bottom. I reattached the lid with the new hinges and my trunk remake is finished!

It only took 3 years and the fabric, padding and feet cost about five times what the trunk cost, but I still got this gorgeous trunk finished for less than $75! AND I was able to repurpose something that would have likely been trashed otherwise. 

I also used the extra fabric I had to made throw pillow covers to tie everything together! 

I do so love a DIY project finished and looking cute!

Love, Misty

Southern Blackberry Cobbler

Happy Labor Day! It is day full of beaches, pools, grills, eats, drinks, family and friends. Most of the United States celebrates this day as the end of summer. Here in the South, it means NOTHING though. Today will not end summer. Summer will be with us in all her hateful glory for weeks, months and possibly through Christmas.

Thanks, Summer. Thanks. ~ Love, The South

In addition, she often decides to invite her friend, Hurricane Season, along for the ride. Awesome.

Summer brought an uninvited friend to the party. Thoughtful really..

.

It is what it is though. I suppose we should be used to it, but for some reason I always feel hopeful September 1 that it is going to be different this year. Nope. Never different.

So I have the A/C cranking and will embrace summer and all the luscious things that come along with it here in the South — namely fresh blackberries.

Now, you can buy blackberries at the grocery, but I prefer to be a true Southern kid and get out and pick the free ones. I’m blessed with family land and as long as you can get out before Weed Spray Day happens, you can often pick as many blackberries as you can carry. Unless you are picking with my sister and she sees a snake, because at that point, you are done picking for the day. I didn’t get out this year to pick (the grass was really high and I will publicly say I hate a snake, but actually, they scare me too — and I don’t want to hear that they are more scared of you than you are of them, because I have NO TIME for a Mr. No Knees in my life). BUT, I found a frozen bag of berries the other day when I was cleaning out my freezer. So, Blackberry Cobbler!!!

Blackberry Cobbler is this amazing concoction of berry juice, dumplings, crust and either ice cream or whipped topping. There is nothing health conscious about it, but it is oh so good as a treat!

The first step is to make a crust. Now, I prefer to make mine from scratch and I honestly thought I was using one that was The Pioneer Woman’s and it was exactly as she has it published, but I can’t seem to find it on her website, so maybe I made some changes. I do that alot…like most of the time…

Now, the key with this crust is that you need to do it the day before so it has time to chill overnight. You CAN use store bought crust (*shudder*), but this is super easy and you can do it!!!

First, gather all of your room temperature ingredients and equipment: flour, salt, vinegar, an egg, a bowl, a spatula or wooden spoon, a pastry cutter and plastic wrap. You will also need some shortening and unsalted butter, but those need to stay cold.

A pastry cutter… you need one of these! You can use forks, but honestly, this makes cutting in fats (butter, shortening, etc) so much easier.

Start out by placing 3 cups of all purpose flour and 1 tsp salt in a bowl and mix slightly. Working quickly, remove butter and shortening from the fridge and cube. Try to not touch either item too much, you don’t want the warmth from your hands to break them down. Using the pastry cutter, work the butter and shortening into the flour until the mix resembles course crumbs.

See the crumbs? Just try to not use your hands so they do not melt..

To your flour mixture, add 5 TBS of COLD water, 1 well-beaten egg and 1 TBS of vinegar. Using your spatula or wooden spoon mix this until it is all combined. You might find at the end you need to use your hands to fully incorporate everything. That is fine, but again, work quickly and try to limit how much you touch the dough. Divide the dough in half and wrap each piece tightly in plastic wrap. Gently shape into a disk, place in the refrigerator and chill overnight. EASY!

The next day, take your blackberries – about 2 pints – and place them in a large sauce pan along with 1 cup of sugar and about 1/2 cup of water. Stir the mixture until coated. Turn the heat to medium and allow the berries to come to a simmer and release their juices and break down. At this point, I smoosh and strain my berries because I don’t like the seeds, but if you don’t mind them, then just use them as is.

Preheat the oven to 350°F. While your berries are simmering, grab a dough disk along with some flour, a rolling pin, a knife and a well-sprayed casserole dish or Dutch oven. Place one of your dough rounds on a well-floured, clean surface. Dust the top with a little more flour and roll to about 1/4″ thick. Again, you need to work quickly or the butter and shortening starts getting sticky. Don’t panic if this happens, just add a little more flour and work fast. Cut the dough into squares and gently place them into the boiling berries. This will become the yummy “dumplings” in the cobbler. Allow this mix to bubble away while you prepare the crust.

Finger is not bleeding…it is just a berry juice splash.

Next, take the remaining dough round and place it on a well-floured surface. Flour the top and roll it out to about a 1/4″ thickness and roughly in the shape of your prepared dish. Carefully pour the berry and dough mixture into the prepared pan. Place several pats of butter around the dish.

Gently fold the crust over the rolling pin and lay over the top of the berries and dumplings.

Use the rolling pin to help you lay the dough over the juice so it does not tear.

Trim off any edges that are overhanging the dish and cut several vent holes in the crust.

Vents – don’t worry if juice comes through

At this point you can slightly sugar the top of the crust, but I don’t usually do so. There is no need to brush the crust with milk or egg since it has so much butter and shortening. Place the whole thing in the preheated oven and bake until golden brown, about 30 minutes. I also bake the trimming scraps and have them as a snack while I’m waiting for the cobbler to cool enough to eat!

Dough scrap snack!

Once the cobbler is golden brown…

…remove it from the oven and allow to cool for a bit. You want to serve while the cobbler is still warm, but not piping hot. I prefer to have mine with a bit of Blue Bell Homemade Vanilla, but whipped cream is tasty as well!

I hope you enjoy this one!

Love, Misty

Southern Blackberry Cobbler
Double pie crust:
3 cups all-purpose flour
1 tsp salt
3/4 cup unsalted butter, cold
3/4 cup shortening, cold
1 egg, beaten
1 TBS vinegar
5 TBS cold water

Filling:
2 pints fresh black berries
1 cup sugar
1/2 cup water

Optional:
3 TBS butter
Sugar for dusting
Ice cream
Whipped cream

To make crust, place flour and salt in a bowl and mix slightly to combine. Working quickly, cube cold butter and shortening and add to flour. Using a pastry cutter, work the butter and shortening into the flour until the mix resembles course crumbs. Add COLD water, well-beaten egg and vinegar. Using a spatula or wooden spoon mix until combined. Divide the dough in half and wrap each piece tightly in plastic wrap. Gently shape into disks and place in the refrigerator to chill overnight.

Next day:
Preheat oven to 350°F. Prepare a casserole dish with non-stick cooking spray.

To make filling, place berries, sugar and water in a large sauce pan. Bring to a boil, then reduce to a simmer. Simmer mixture until berries have released their juices. If you like, you can smash the berries and strain the seeds for a smoother finished cobbler.

Place one of the chilled dough rounds on a lightly floured surface and roll to approximately 1/4″ thick. Slice into approximately 1″x1″ squares and place them in the simmering berry mix. Allow them to cook until most of the dough pieces have risen to the top.

While dumplings are cooking, place remaining dough disk on a lightly floured surface and roll to approximately 1/4″ thick and roughly in the shape of your prepared dish. Carefully pour hot berry mixture into the prepared pan and dot the top with 3 TBS of butter. Gently place the rolled out crust over the top of the berries. Trim any overhanging dough and cut several vent holes in the crust. At this time, you may dust the top of the crust with sugar if you want.

Bake at 350°F for 30 minutes or until golden brown. Once baked, remove from oven and allow to cool slightly. Serve warm with ice cream or whipped cream.


A First Time For Everything

“So throw off the bowlines. Sail away from safe harbor. Catch the trade winds in your sails. Explore. Dream. Discover.” 

~ Mark Twain

Why am I here? Pretty big question to answer. Heck, why are any of us here? Mainly because God put me here and gave me a set of talents and told me to use them to glorify Him. I’ve spent 35 years trying to figure out exactly how to glorify Him with the talents I was given. I can’t really sing. I can’t play an instrument — I REALLY want to learn to play the piano well enough to help out at church, but I’m scared to even try because years ago I was gently and lovingly told it wasn’t for me by my piano teacher (mainly because I couldn’t sit still and she was too sweet to tie me to the bench). I’m not really the best witness for Him because I fail Him every single day. 

That said, however, I can cook. And I can write. And I even think I’m kinda funny in a weird and quirky you-really-need-to-be-my-friend-and-love-me sort of way. Yeah, see what I did there, AP? I used a LOT of hyphens even though you told me not to because I’m protesting that particular move. Stand strong my writing friends! I also have an insane job that takes me to crazy places and introduces me to crazy people and allows me to spread my wings every single day about as wide as I wish. 

Horny Mike and Kevin from Count’s Kustom with me at SEMA 2018

I also like to believe I’m handy, but that usually gets me into the most insane situations ever with the most ridiculous results possible. I try to sew – usually with mixed success. And I like taking pictures — not like a professional, but for fun and to document where I have been! 

Grand Canyon South Rim

Several of my family members and friends have been bugging me to start a blog just to share the stupid things I get into. I have wanted to as well for a long while, but have stopped myself because isn’t it the height of hubris to assume anyone wants to hear what you have to say? You know, oh well. Maybe this is the platform I’m supposed to use to proclaim the glory of my Maker. 

So here we go! I warn you upfront, I often ramble — you haven’t caught that yet, right? — and I often fail at the projects I try on my first try, but isn’t the key to success to just not give up? I think that is also the definition of crazy, but who the heck cares. Life is about perspective, right??? Don’t you hate all the posts that just seem like they are perfect every time on the first go out of the gate? I want to know how many times you failed before you got it right because maybe I don’t even want to try this!

FAILED and gave up on macrons after three attempts

So here are some things I’m going to focus on: 

  • Food — things I make along with the recipes and pictures so you can make them yourself
  • Travel — what am I seeing that you need to experience and what I wish someone would have told me to skip
  • Pictures — I’m not going to pretend that I’m an expert, but hey, if I can do it, so can you!!! 
  • Bible studies I’m currently enjoying — the whole world could use a little non-judgemental Jesus, I promise 🙂 

I really hope you want to join me on this journey and I hope that you tell your friends as well. I cannot promise it is going to be pretty, but I promise to laugh if you will! 

Love, Misty